Understanding ISO invariance can greatly improve your low-light photography
If you frequently shoot in low-light conditions, understanding ISO invariance behavior of camera sensors can significantly improve your results (even if your camera sensor is not considered ISO invariant). ISO invariance means that the light data captured by the sensor passes through the same electronic circuitry regardless of the ISO setting (this applies to most camera sensors at high ISOs).
In practical terms, this allows you to underexpose your images by 1 to 2 stops in-camera and then boost the exposure by the same amount in post-processing—without introducing additional noise. It's important to note that this technique applies only to RAW format images, as JPEGs and other processed formats do not retain the same flexibility.
Before diving into the practical benefits, let's briefly review digital noise. Digital noise is primarily caused by a lack of light—too few photons reaching the sensor—resulting in a low signal-to-noise ratio. When you increase the ISO in-camera, you're amplifying both the signal and the noise. Interestingly, amplifying the noise in-camera produces roughly the same result as increasing exposure in post-processing. However, using higher ISOs comes with two notable drawbacks: 1) highlight clipping – higher ISO settings increase the risk of blowing out the brightest parts of your image, and 2) reduced dynamic range – higher ISOs decrease the total number of stops between pure black and pure white that your sensor can capture.
So, when is underexposing advantageous? Let's look at two real-world low-light scenarios.
Example 1: Milky Way Photography - Kouchibouguac National Park
For nightscape images like the Milky Way, start by selecting your widest comfortable aperture (e.g., f/2.8 or f/1.4 in the example below). Then choose the longest shutter speed that avoids visible star trails—for instance, 8 seconds, calculated using the NPF (Nightscape Photography Formula) developed by Frédéric Michaud of la Société Astronomique du Havre. If you determine that a "correct" exposure would require ISO 3200, instead shoot at ISO 1600 or ISO 800, deliberately underexposing by 1 to 2 stops. In post-processing, you can push the exposure back up without a noticeable increase in noise. Remember: the actual amount of light hitting the sensor depends only on aperture and shutter speed—ISO simply amplifies the signal afterward.
Example 2: Night Event – Shediac Winter Carnival
In this case, I used the lens at its widest aperture (f/1.8) and set the shutter speed to 1/60s to freeze motion while maximizing light capture. I chose ISO 800, which resulted in an underexposure of about 2 stops. Later, I increased the exposure by 1.6 stops in post-processing.
Again, the key advantage of boosting exposure in post (rather than raising ISO in-camera) is threefold: 1) you preserve a greater dynamic range, 2) you protect your highlights from clipping, and 3) maintain comparable noise levels—thanks to the sensor's ISO invariance.
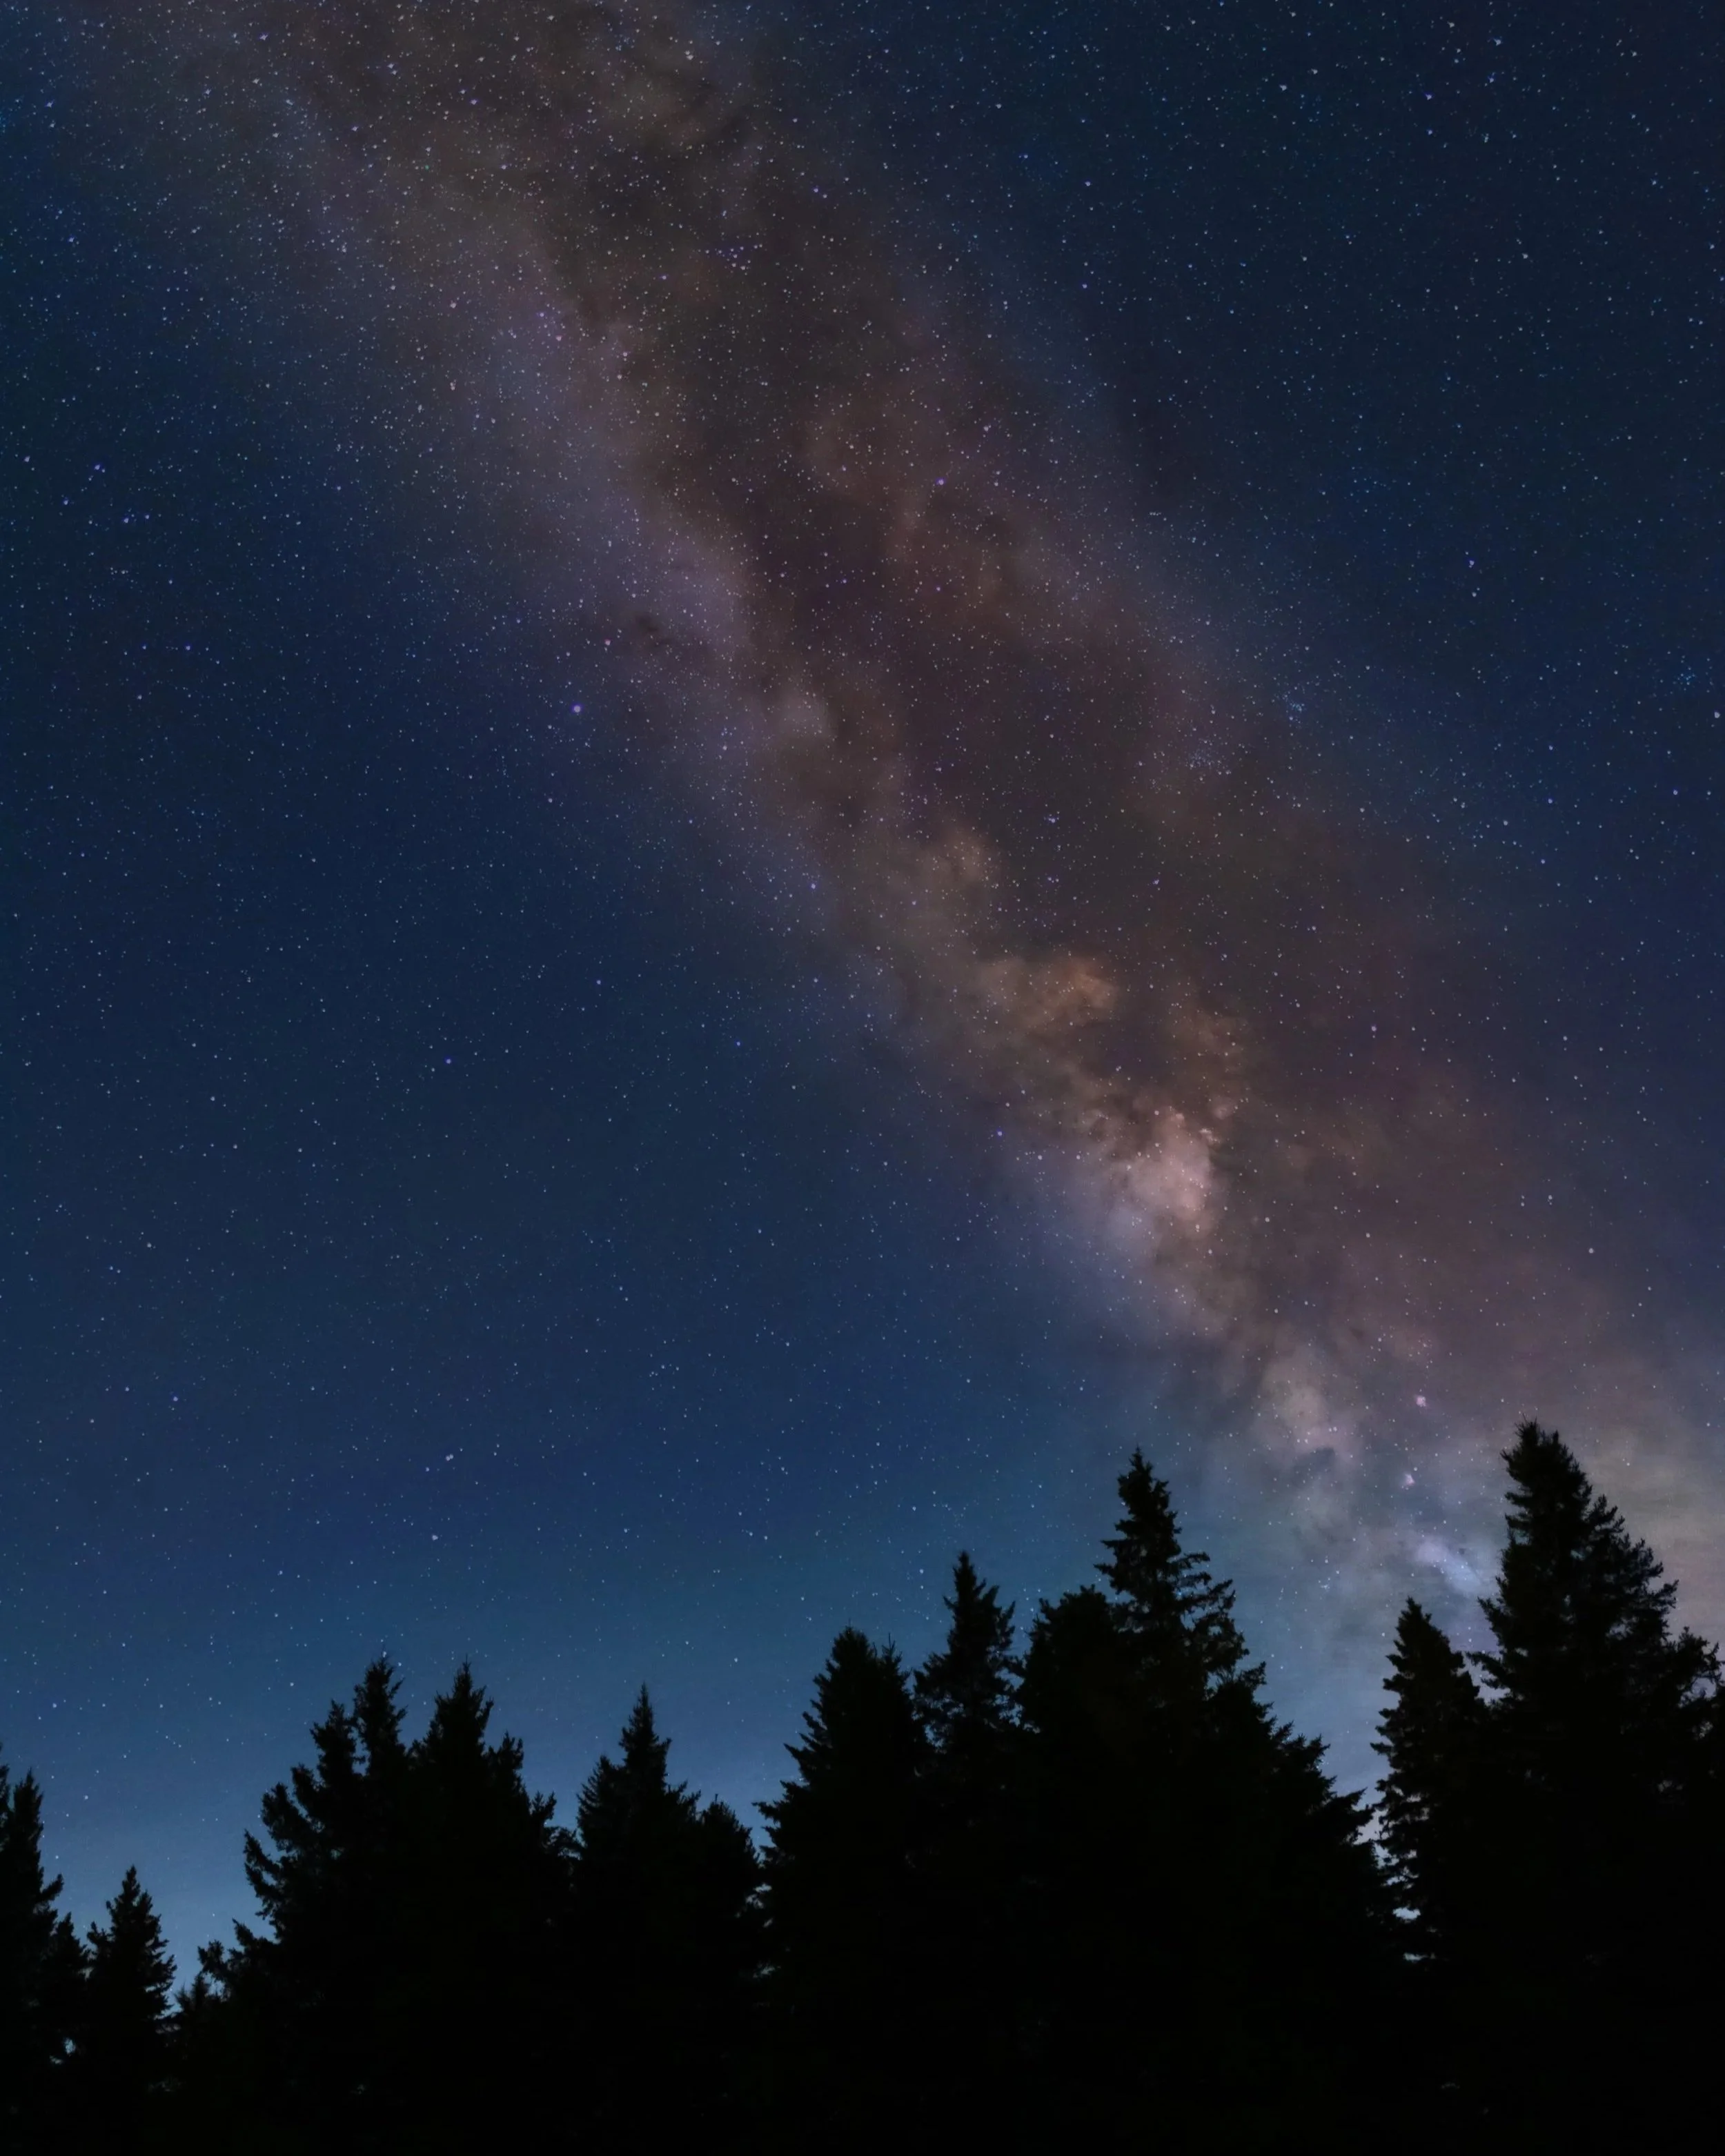
This image taken at the Kouchibouguac National Park has the following settings: aperture f/1.4, shutter speed of 8 seconds and ISO 1600. The exposure was increased by 1.4 stops in post-processing
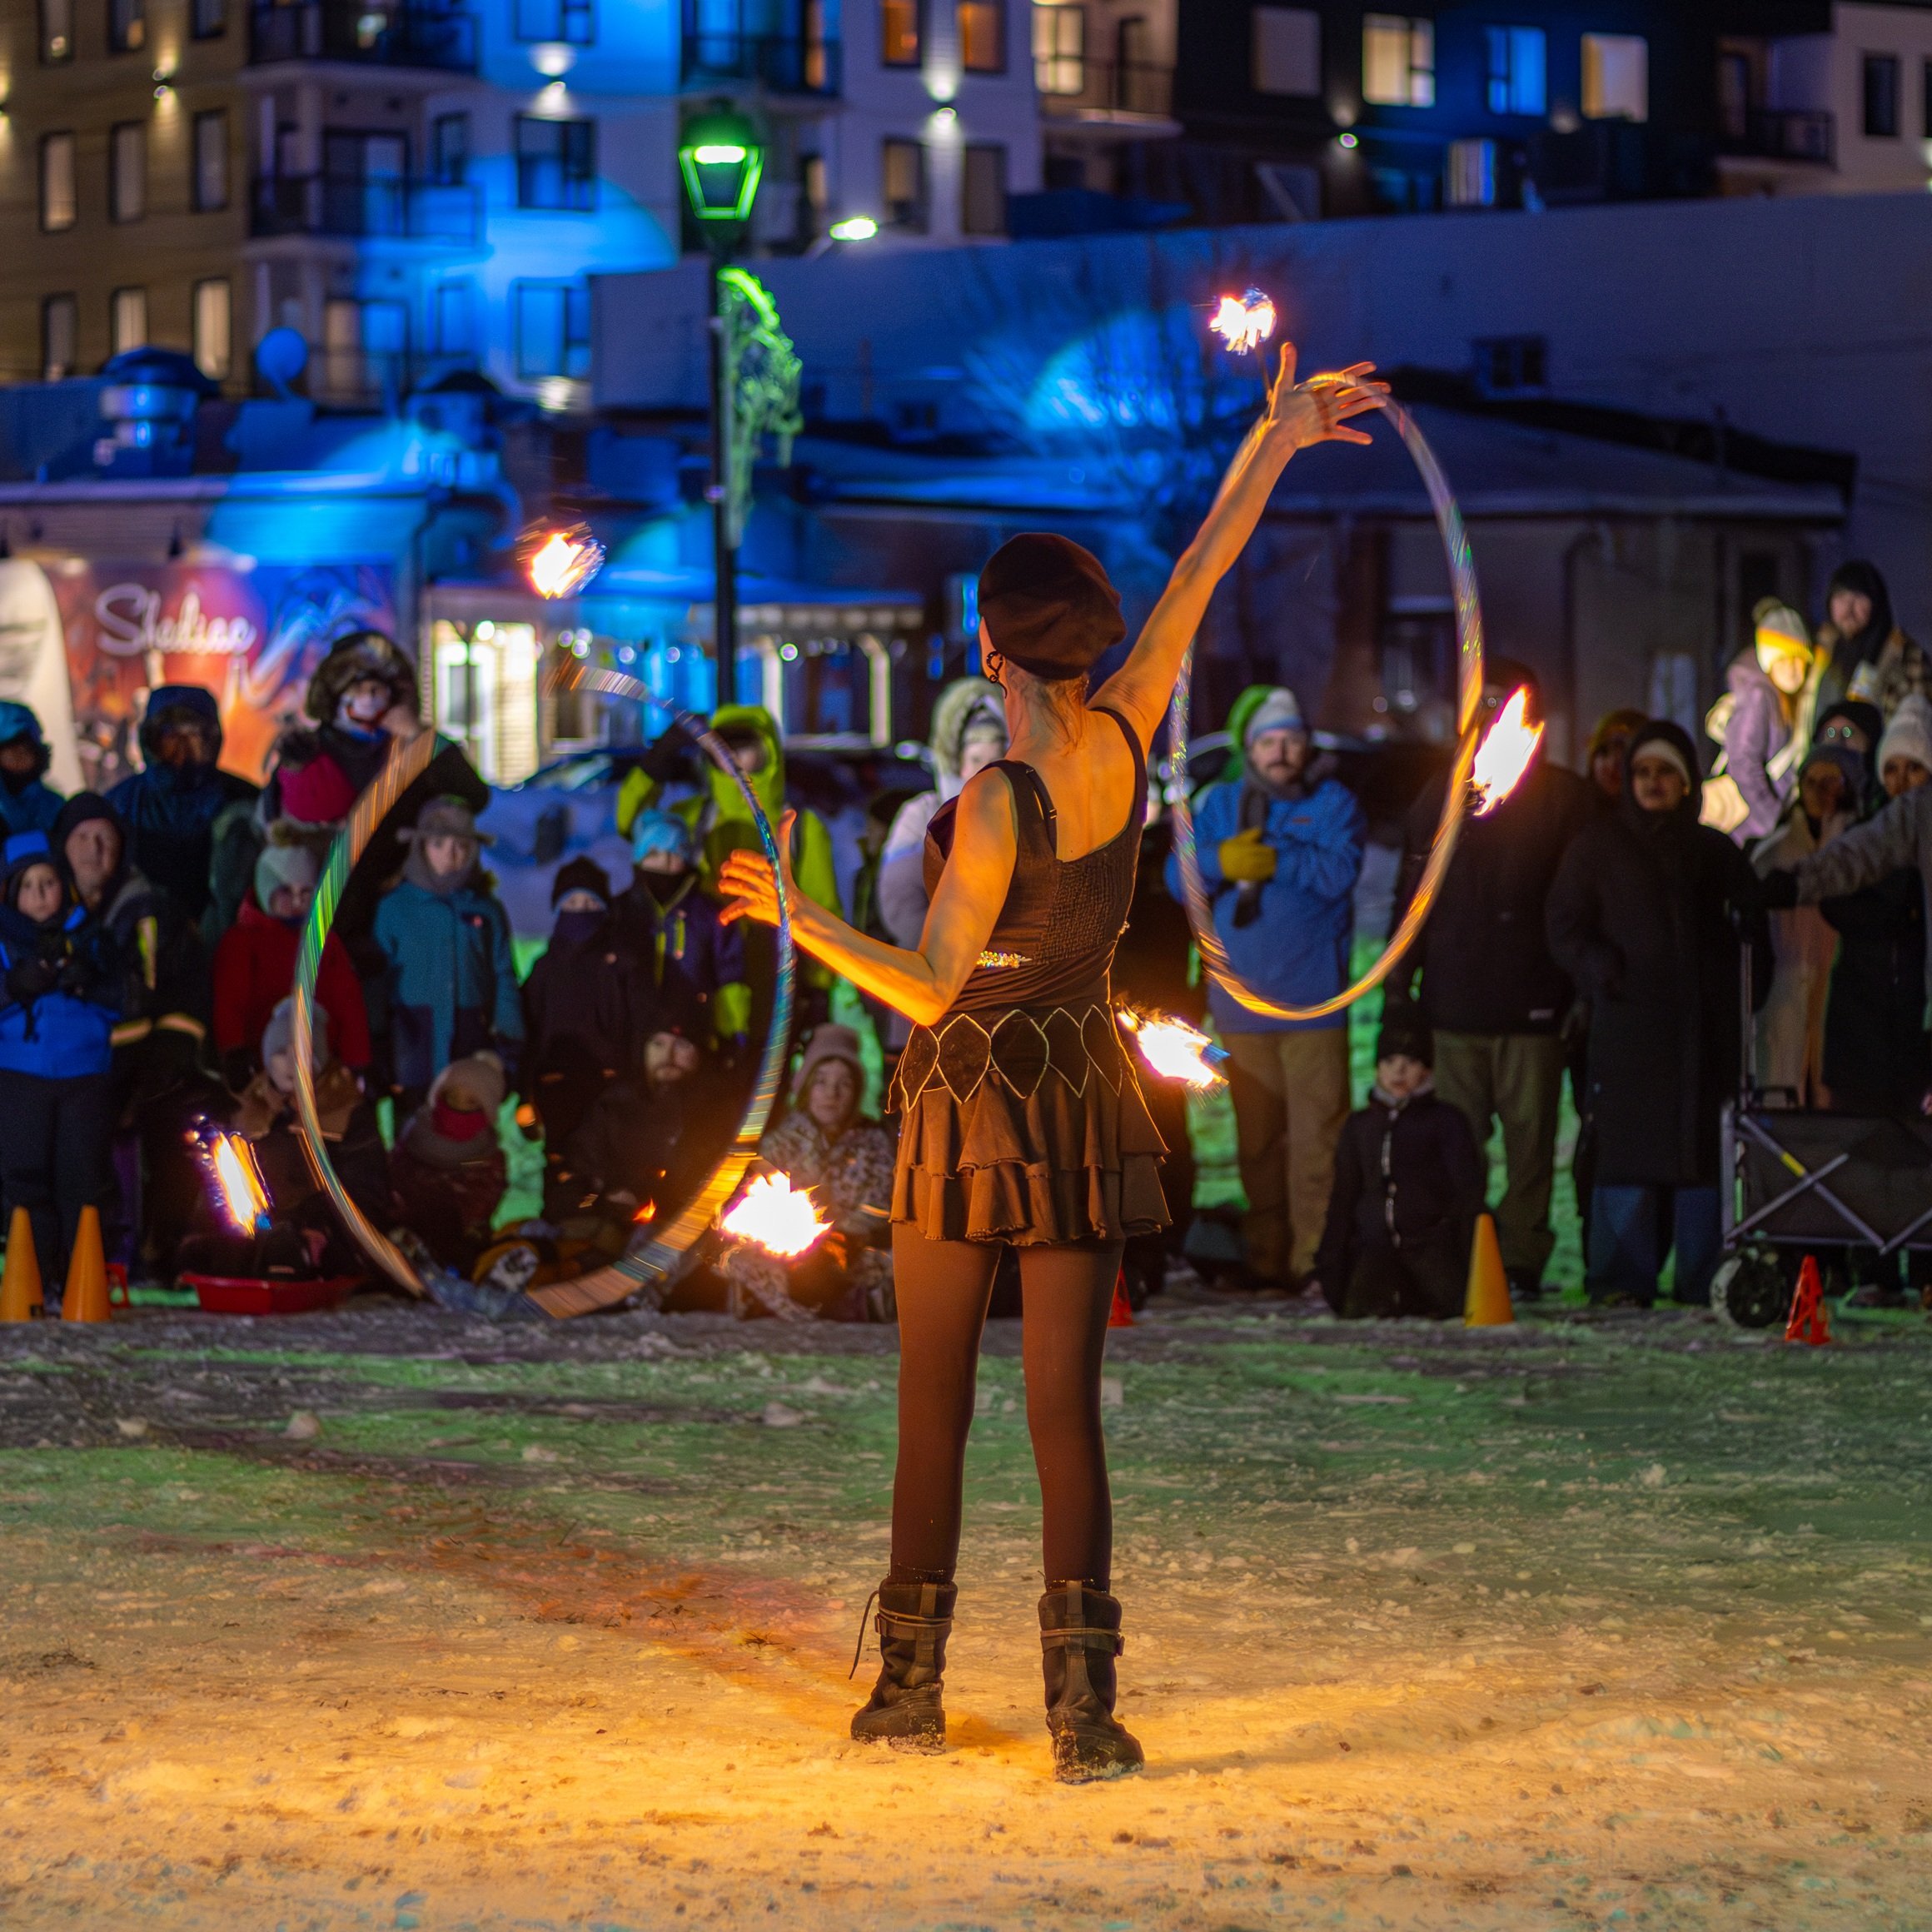
This image taken at the Shediac Winter Carnival has the following settings: aperture f/1.8, shutter speed 1/60s and ISO 800. The exposure was increased by 1.6 in post-processing