How to create a Pep Ventosa style photograph
In this blog, we will explore the multiple-exposure technique used by some photographers to create an impressionistic, painterly effect in photography. Many photographers have used this technique in various settings, such as for specific city landmarks, famous buildings, trees, and streetlamps. Photographers known to have used this technique include Frank Machalowski and Ian Turnage-Butterbaugh; however, Pep Ventosa is probably the most recognized photographer associated with it.
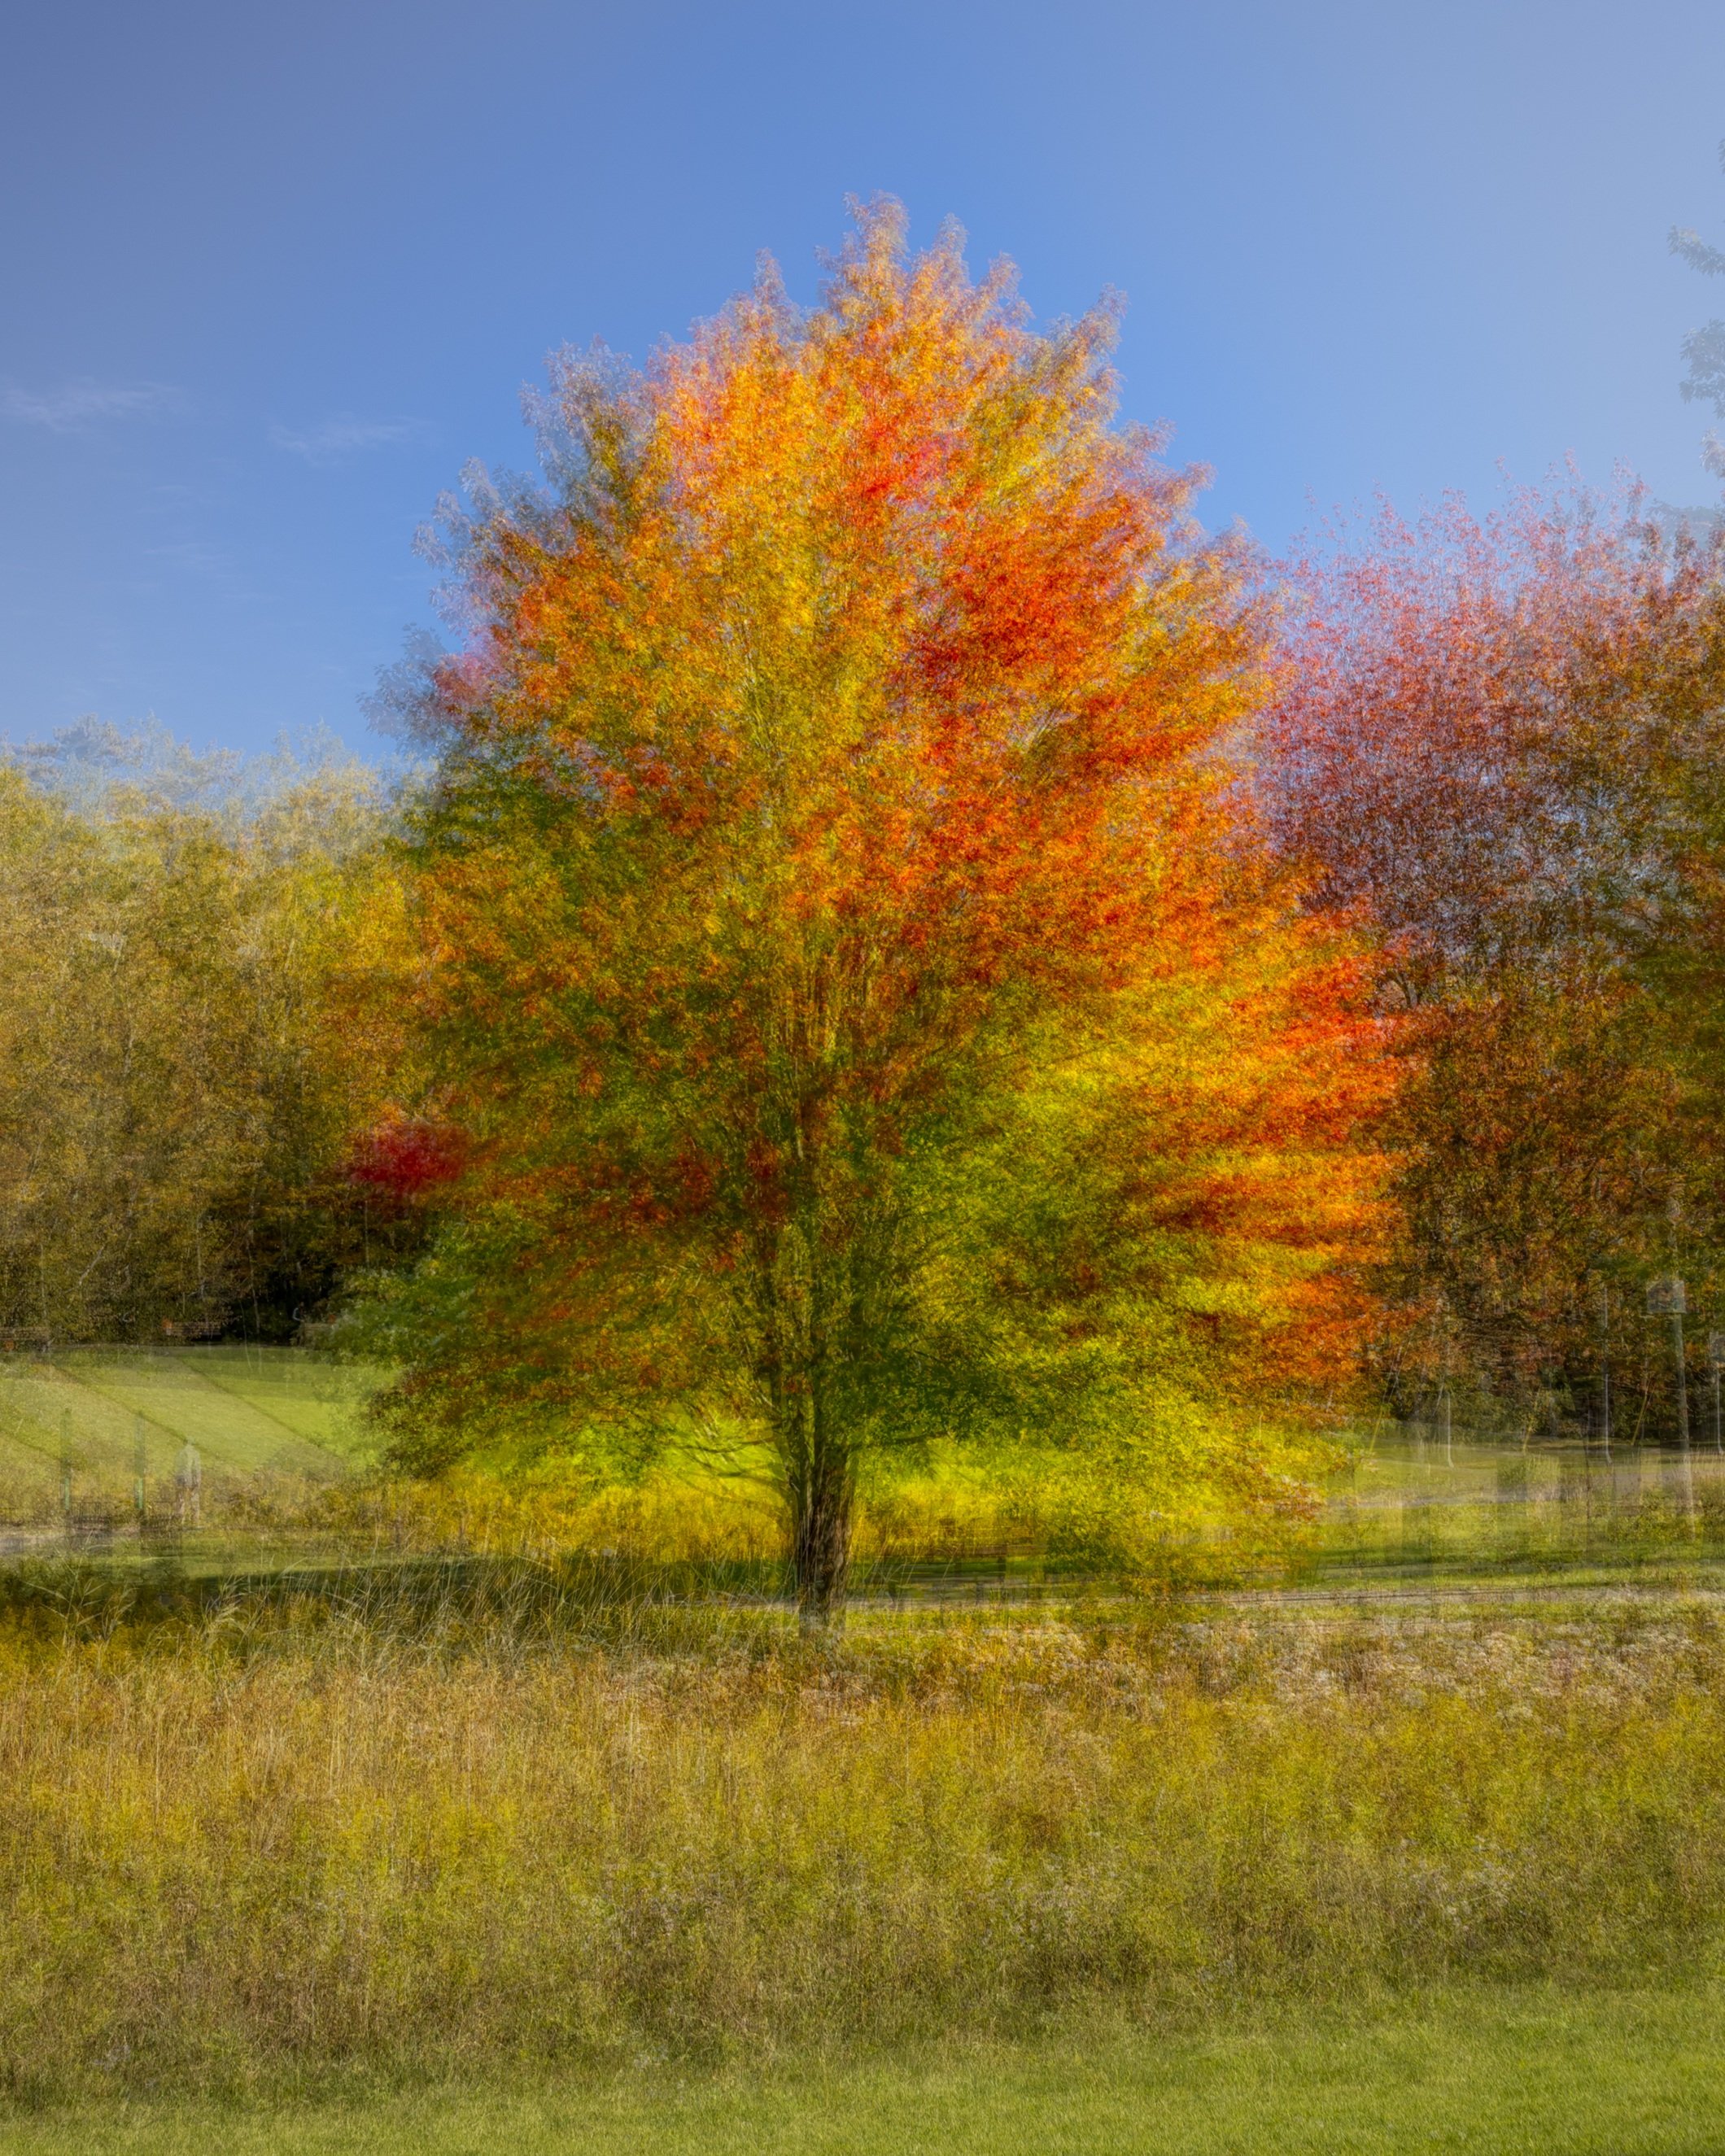
There are many ways to capture images for this technique—either directly in-camera or using Photoshop in post-processing. In this blog, we will explore only one approach: capturing the images first and then creating the technique in Photoshop.
The first step is selecting a subject. Pick an isolated subject, such as a tree, a building, or a statue, and then take images at roughly equal distances from the subject but from different angles—that is, by moving around the subject. Some photographers move in a full circle (a complete 360°), while others take fewer images in an arc around the subject. You can capture as many frames as you like, but I have found that between 5 and 10 images work well.
As the image below shows, the selected subject was a tree. I moved around the front of the tree through an angle of about 45 degrees, capturing 5 images. Once you have captured your images, you can edit them in Lightroom (generally for color, exposure, and so on). You can edit the first image, then Sync all the other images to these settings to ensure they all receive the same treatment.
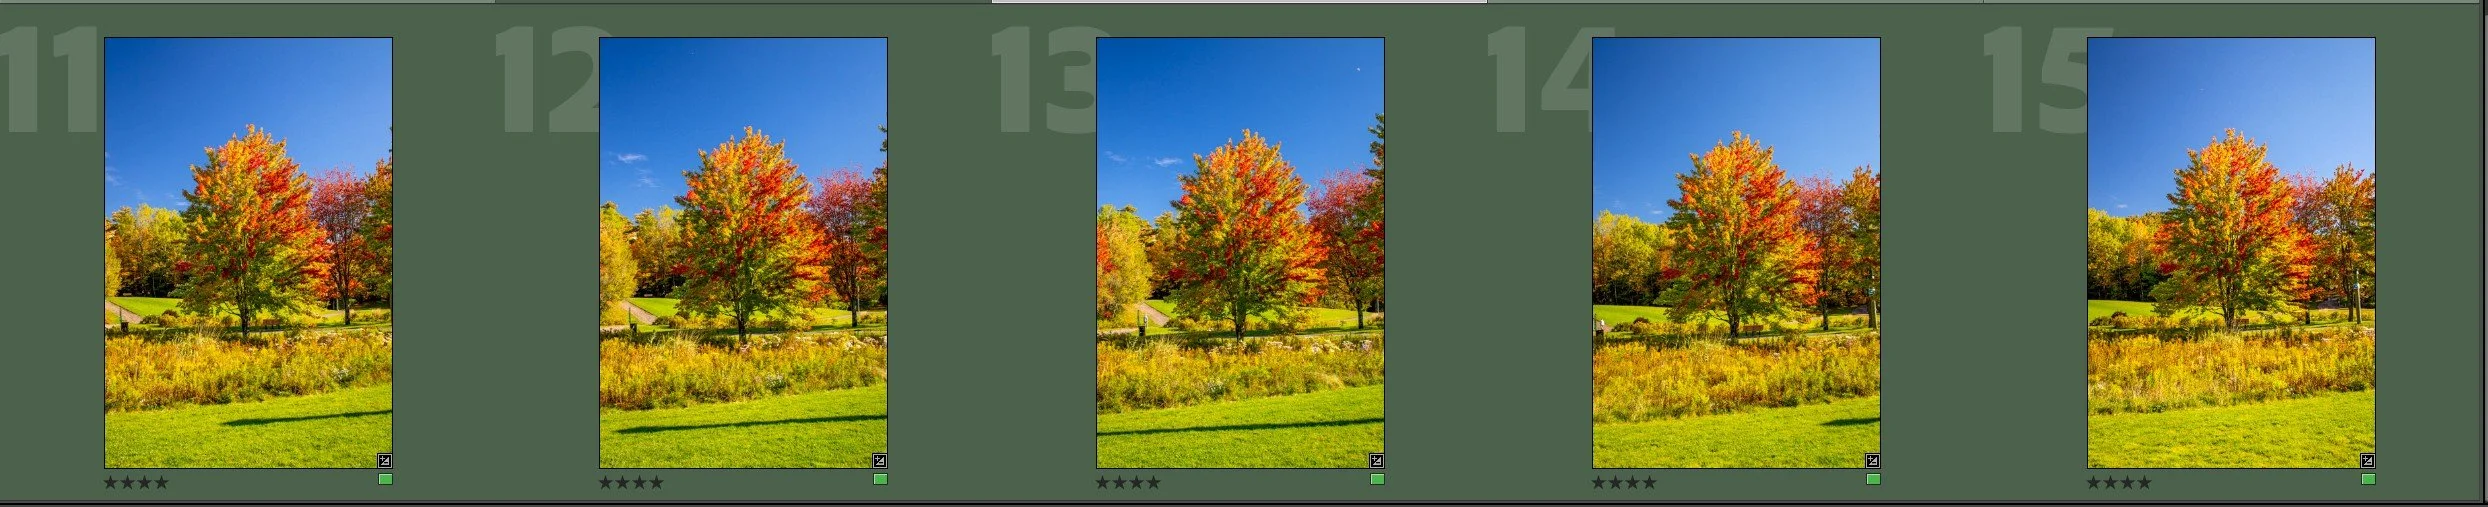
Five images captured to create the Pep Ventosa style technique
Once your images have been edited in Lightroom, bring them into Photoshop. While in Lightroom, select the five images by clicking on them, then go to Photo → Edit in → Open as Layers in Photoshop. When your five images are in Photoshop, select all five layers (images) by clicking on them, then auto-align them via Edit → Auto Align Layers. Here, the Auto option works fine. Once your images have been aligned, you can turn off all layers (by pressing the eye icon next to each layer) except the last two images (Image 1 and Image 2; see figure).
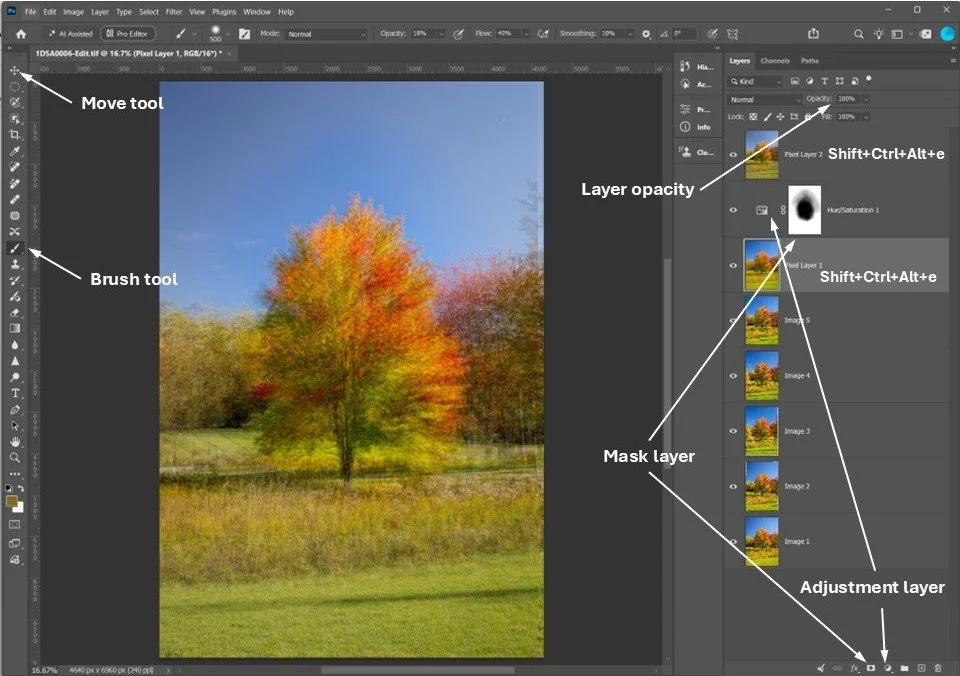
Screen shot of Photoshop showing the different icons used in applying the above technique.
At this stage, click on the Image 2 layer and set its opacity to 50% (100/2). Then select the Move tool and slightly move the image until you achieve the multiple-exposure effect you like. When you are happy with the look, activate Image 3 (by pressing the eye icon for this image), set its opacity to 33% (100/3), and move the image slightly as you did with the previous one. Repeat this process with Image 4 (opacity at 25%, i.e., 100/4) and Image 5 (opacity at 20%, i.e., 100/5). At this stage, you have turned your 5 images into a Pep Ventosa style image. You can save your image and go back into Lightroom to apply your final edits (crop, etc.). However, I generally apply one more level of adjustment to my image: desaturating the overall surroundings of the tree while keeping the tree saturated.
To do this, press Shift + Ctrl + Alt + e, which will create a merged pixel layer of all your adjustments so far. This layer is Pixel Layer 1 (see image above). Click on the Add New Adjustment Layer icon and select Hue/Saturation. Lower the saturation as you see fit, then click on the Add Layer Mask icon. The mask should be white, meaning that you only see your recent desaturation adjustment. To reveal the tree's original saturation from the previous layer, you will need to paint on this mask using the Brush tool and black paint (see the mask layer—the black part of this layer). This brings me to my final edit in Photoshop. I then create another pixel layer by pressing Shift + Ctrl + Alt + e on the current layer. To save your work, click Save in the File menu at the top. Go back into Lightroom to apply any other edits (e.g., cropping the final image).